
Install Label Printer
- Install the label printer software and driver on the PC. The disk may have come with the printer or you may have to download it from the label printer website. Make sure it is working with a test print. You can open the Notepad application, type a few words and click print.
- On the printers and scanners page, click on the printer then Manage (in Windows 10) to set it as the default printer. On the same page, select Printing Preferences to set the default paper size to the size of label you are using (2.4 for Brother Printer).
Customize Settings In Chrome
- Open Chrome, login to Churchteams and start check-in (Check-in / Start Check-in) with any Check-in view.
- Pick anyone in a group class or class associated with that check-in view and click print. This will open a Print screen.
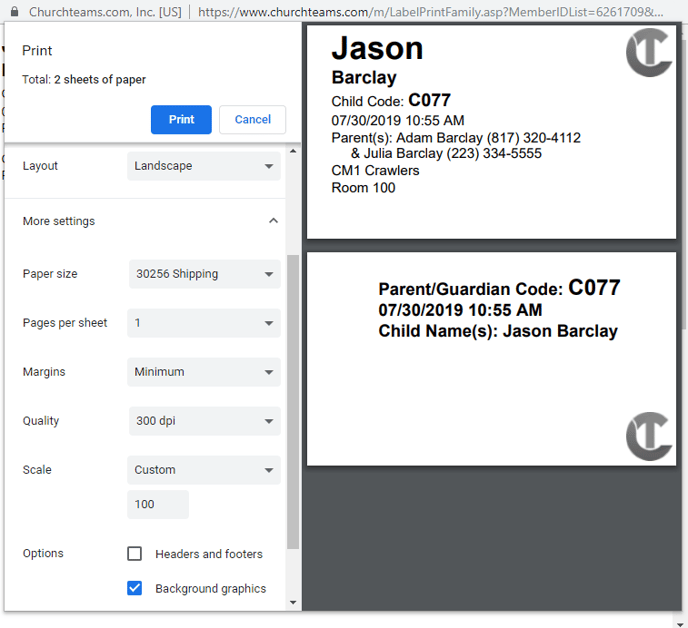
- On the Print screen choose your default printer for the Destination, and select Landscape for Layout.
- Click “More Settings” to view additional settings
- Choose your Paper size (For Brother printer choose 2.4)
- For Margins choose Minimum.
- For Options uncheck “Headers and footers” and check “Background Graphics”
Save For Quick Access
- Close the webpage and completely quit Chrome. (This will save your settings)
- If you don't have a Chrome shortcut on your desktop, open Chrome, click on the three vertical buttons in the top corner, "Cast, save, and share" , Create Shortcut.
- Right click on the Chrome shortcut icon on the desktop (not in the task bar) and click Properties.
- In the Target field go to the end of the filename, click the space bar twice and add --kiosk-printing, then click Apply.
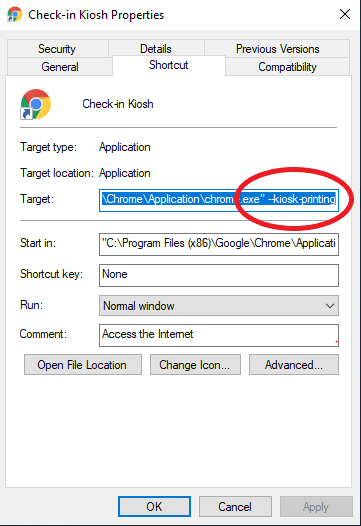
If your Target field looks like this, you have a newer version of Chrome. Highlight and delete the bold letters....\Google\Chrome\Application\chrome_proxy.exe --profile-directory=Default --app-id=kadpmjecflhjgcmakagepmdlkbmdpfhhThe final output should look like this:...\Google\Chrome\Application\chrome.exe --kiosk-printingOr if the google chrome.exe has a double quote after it then it would look like this:...\Google\Chrome\Application\chrome.exe" --kiosk-printing - Finally, click on the General tab and rename the short cut Check-in Kiosk, then click OK.
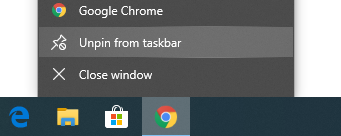
- We would recommend to unpin the Chrome icon from the task bar to prevent confusion.
- Click on the Chrome Kiosk icon you created and go to the Churchteams login page.
- Be sure to click on Check-in/Leader Login button and save that page as the home/startup page in the Chrome Settings for easy access and then Start Check-in.