1. Create your Connection Card group. Go to Groups & Events > Create. To learn more about how to create a group and what each of the fields on the group page mean, click here. You can name this group how you like - Connection Card, Information Card, Guest Registration - just something that makes sense to you.
2. Create groups to launch workflows. Some examples are: Interested in Children’s Ministry, Interested in Small Groups, How Do I Join This Church, and I'd like info about Baptism. This step isn't required, it's only necessary if you want to have groups that will align with the responses on your Connection Card.
3. Create your connection card form. From within the Connection Card group you just created in Step 1, click Registration then Settings and scroll to the Registration Attributes dropdown on the bottom left. Start with the personal (member) information you want, such as Email and Mobile Phone.
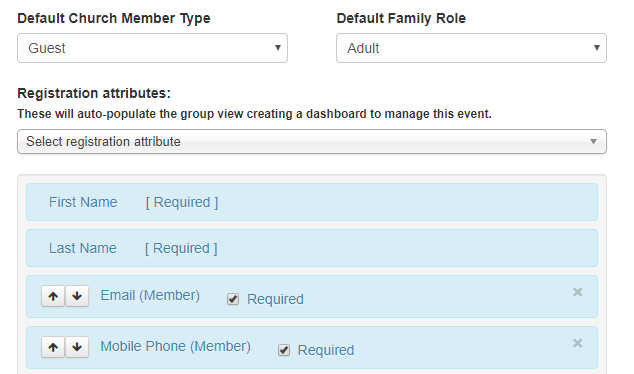
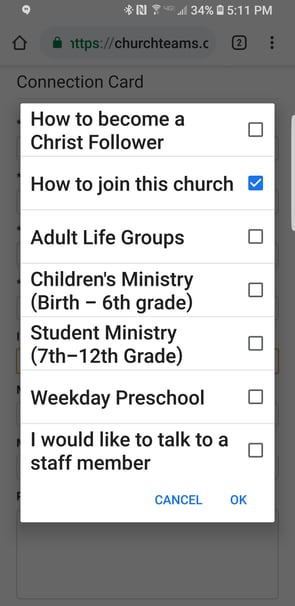
4. Add in Member and/or Registration Attribute questions. These are the questions and responses you might have on your paper Connection Card such as Mobile Phone, Email, Birthdate, "I would like more information about..." or "My Decision Today is..."
- To the right of the drop down menu, click Registration Attributes. Create the questions and responses unique to your connection cards.
- On the Customize Group Registration Attributes page, click the blue New Attribute button. There are several attribute types, the most common being drop down or text field. The attribute name is the question you are asking, such as "I'd like more information about..."
If you created groups in Step 2 that align with the registration responses, use the Auto Register feature to match the appropriate group to each response as you create these registration attributes.
Save these newly created registration attributes and they will show up as options you can add to your registration form (from the "Select Registration Attributes" drop down menu) when you go back over to the group's Registration Settings.
When you aligned your connection card responses (step 4) to your step 2 groups, you automated registration into that group. In turn, this launched the workflows associated with that group. Now go through the workflow creation process for each response: map, resource, build and launch.
5. Add a prayer request section. Do this by selecting that option in the Registration Completion Options on the settings page of your connection card group. If a guest adds a Prayer Request, this will show on their Member page under Notes. You can run a Member Listing with Notes report each week to see all prayer requests in one place.

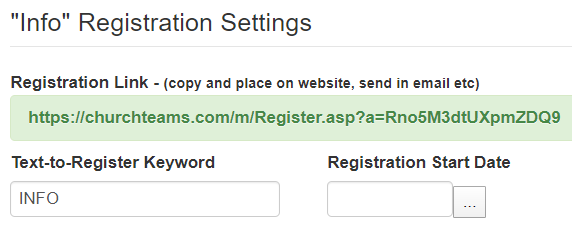
6. Share the link or keyword. From the top of the Registration Settings page of your Connection Card group, copy the link or create the keyword to use to direct people to your new digital connection card.
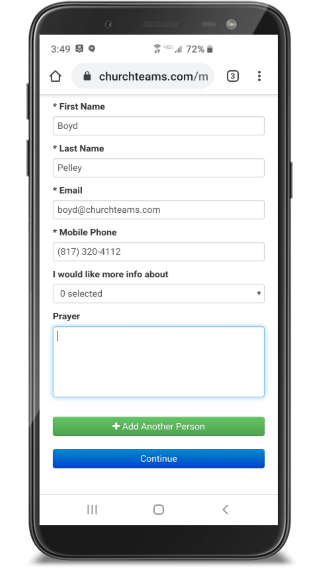
People will now be able to text a keyword or click a link to see your digital connection card. It will look something like this.