
The information shown on a Check-In label comes from two areas in Churchteams - the member information (attributes) and the group information. You control which items are to be displayed on Check-In security labels through the Check-In Settings.
Go to Check-in > Views / Settings.
The Check-in Views and Settings page displays a listing of any Check-in Views you currently have set up, as well as the Automatic Startup Schedule for Check-in sessions. A Check-in View is simply the settings you choose for a particular Check-In session. You can set up a many as you need, but we recommend that you just simply set up a View for each type of service or program you have, e.g. Sunday Morning, Wednesday Night Youth, Awanas, etc.
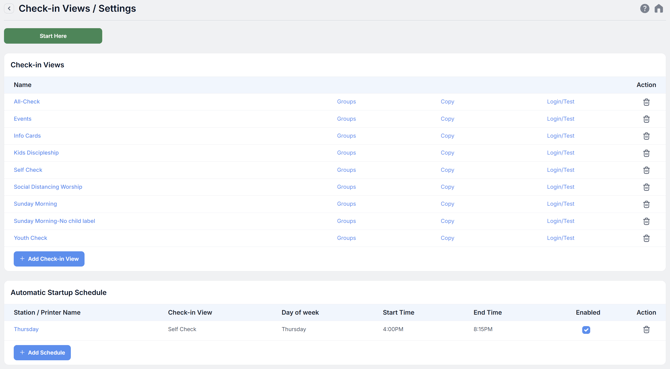
You do not need a Check-In View for each group. Set up a Check-In View and then associate the groups that will be using that View, by clicking the Groups link to the right of the View name.
By clicking a Check-in View name or clicking the ![]() button, you can edit:
button, you can edit:
- Child security label options - what is displayed on the child label
- Parent security label options - what is displayed on the parent label
- Family Check-In options - the fields that show on the Check-In screen
- Add New Family options - the fields when adding a new family via the check-in feature
- Other options - here, you can edit the appearance (including adding a logo) of your Check-In screen as well as set options for the search criteria during a check-in session.
*Note: The edits you make in the Check-In View Settings page will only affect that particular Check-In View.