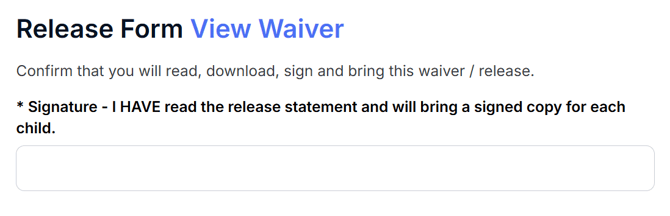
With Churchteams registrations, we have made it easy to a add a cloud based waiver or release form. Here are the steps:
- After you create a group for your registration, click the blue Registration button on the Group page, then click Settings.
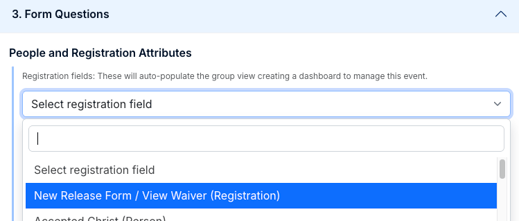
- Go to Section 3 - Form Questions. Under People & Registraiton Attributes, open the drop-down menu and select "New Release Form / View Waiver" listed at the top.
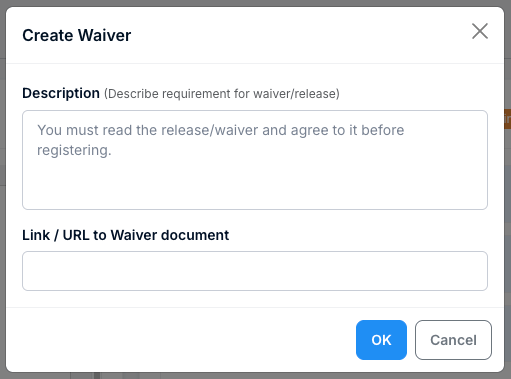
- Use the pop-up "Create Waiver" box to add your description and document link (where you uploaded it to a cloud service like Google Drive, iCloud Drive, or Dropbox). Use the Description field to describe the waiver, such as "Confirm that you will read, download, sign, and return this waiver." Click OK to save the waiver information.
- You may also want to create a custom registration text field for their name to serve as an electronic signature.
- To do this, while still in Section 3 of the Registration Settings, click the "Customize registration fields" button at the bottom of your list of current form questions.
- Click the blue " + New Registration Field" button.
- Select "Text field" as the field type. For the Field Name, instruct the registrant to enter their name as an electronic signature. Click Save, then go back to the group registration settings (button at the bottom of the page) and add this new name/signature field just below your waiver field.