
Churchteams Option allows you to offer pre-check-in for events and provides your event attendees with a text-message confirmation that can be shown at the door as proof of check-in.
This is especially useful for large events where your people can check in before arriving, helping reduce lines at traditional check-in stations. The feature works for events where each individual signs up to attend or where one individual purchases multiple tickets or makes multiple registrations.
When you enable Option E7 in the Check-In Settings, attendees who check in using Text-to-Check-in or the app receive a confirmation text with their check-in information.
Note: The Confirmation Text is ONLY sent when the someone checks in using Text-to-Checkin or the App. If they log-in at a physical kiosk, the registration information for ticket confirmation can be found in the Detail Attendance Report.
How to Set It Up:
Step 1: Start with a Group & add your Event Registration.
In Churchteams, create a group titled with your event name. Then from the Group page, add registration settings. (Registration > Settings)
If your event requires only one person to register but allows for the purchase of multiple tickets, set up a registration question that includes the "Additional Registrants" option and asks for "Number of Tickets." You can find instructions for setting up a registration with the "Additional Registrants" option here: How do I use a registration form to take a reservation count? ("Party of" option)
Please Note: Whatever you name your registration attribute that has the Additional Registrants field set up in its settings, is what will be shown on the confirmation text when someone checks in.
Step 2: Create a Check-In view for the Event Check-In
Instructions for editing Check-In Settings are here: How do I customize the Check-In Settings. Link the event registration(s) you used to this Check-In view by going to Check-In > Views/Settings and selecting “Groups” next to the check-in view.
When creating this Check-In view, select Option E7. Even if you do not want to use Text-to-Checkin, option E7 must be selected in order to appear on the Detail Attendance Report page after someone checks in at a Kiosk.
Step 3: Start Check-In and have people use Text-to-Check
To determine how you want to start check-in, take a look at the following articles:
Once Check-In is started, you can have people Text-to-Checkin and they will receive a confirmation.
If your registration required each individual to sign up to attend, they will receive a text with:
- The number of people they checked in
- The Group/Class they checked into
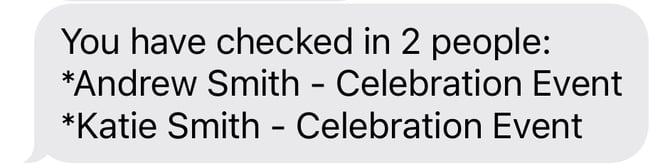
If they signed up under one person who selected the number of people in their party, the confirmation text will show their name with the event and the number of tickets bought. Even if they registered multiple times, it will show all of the ticket purchase history.
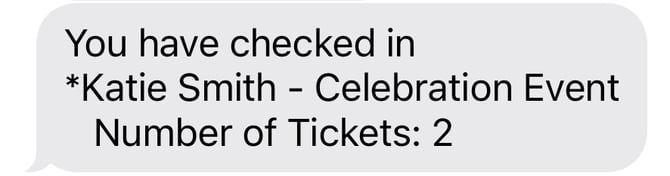
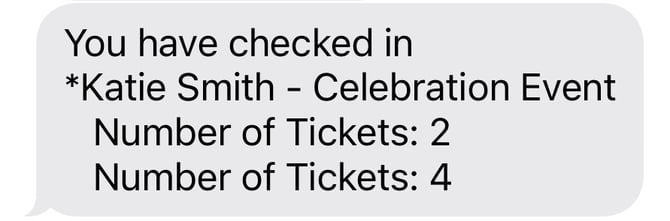
From here, they can bring up their messaging app and show this at the door to confirm their number of tickets. If you use an Automatic Start-Up station, you can communicate with your people to pre-check-in and skip the line by having their confirmation code on their phone before they even walk through the doors.
For those who don't want to Text-to-Checkin, they can still check in at a physical kiosk, and whoever is monitoring ticketing can have the Detailed Attendance Report pulled up to find and see the needed information.
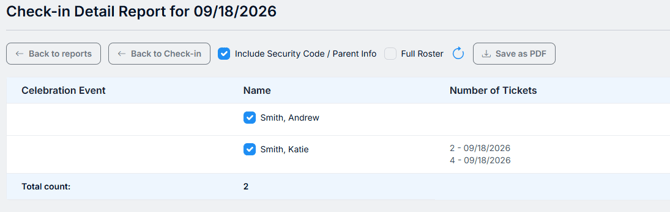
Please Note: Option E7 must be selected in order for the "Number of Tickets" registration attribute to appear in the Detailed Attendance Report.