
To create a registration, start with a group, then add registration settings. If you haven't already, create the group. Whether this is a class, event, or just a form to gather information, we always start with groups! The group then becomes a working dashboard for your registration.
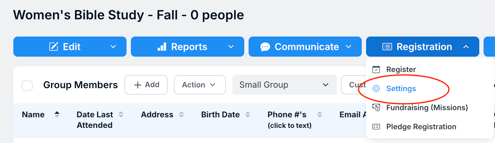 To add a registration form to any group, go to the group page and click Registration > Settings.
The Registration Settings page in Churchteams is set up with a Form Preview on the left and Settings (grouped by sections) on the right. Registration Settings and the Form Preview autosave as you work, including when you edit existing registrations.
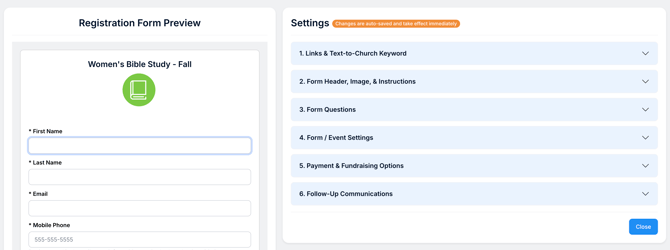
1. Links & Text-to-Church Keyword
2. Form Header, Image, & Instructions
5. Payment & Fundraising Options
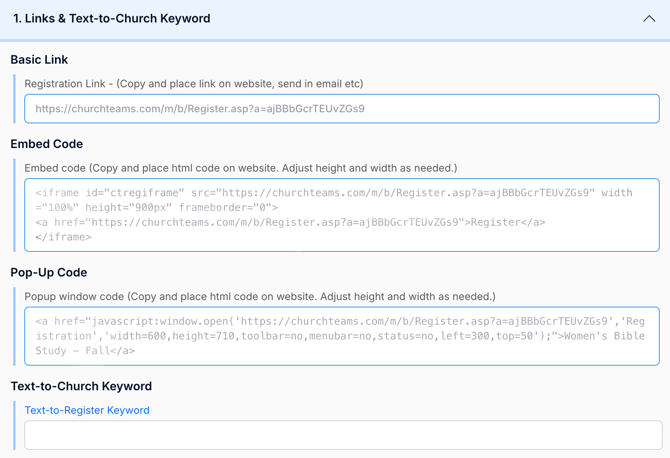
LINKS & TEXT-TO-CHURCH KEYWORD
You'll find the registration form link at the top of this section. Use this link on your website, in emails, and on social media to invite people to register. You can also use the Embed Code or Popup window code, depending on how you'd like your registration to appear on your website. If you are subscribed to Text-to-Church, enter a KEYWORD you want people to text to your Text-to-Church number to complete the form from their phone.Learn more about Text to Register here.
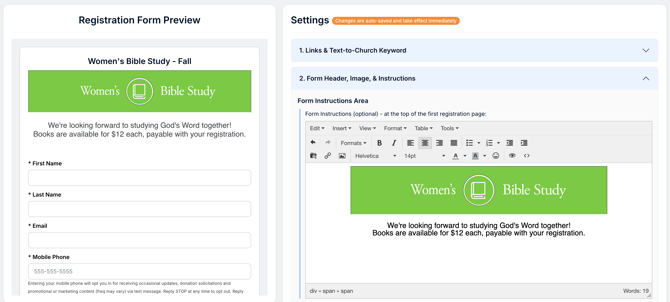
FORM HEADER, IMAGE, & INSTRUCTIONS
Here is where you'll add the... You guessed it: the header, image, and instructions for your form. These are optional, but helpful if you want to add a branded logo or necessary instructions. The title of the group will always appear by default at the top of the form (see preview).
FORM QUESTIONS
The registration form defaults to asking for Name (always required), Email Address, and Phone Number. To add questions to your registration form, select either People Attributes or Registration Fields from the Registration Fields drop-down menu.
To add a custom question not already listed in the dropdown menu, click the "Customize registration fields" button at the bottom of the section. Edits made to the registration form so far will save, but the system will temporarily navigate you to the Registration Fields page, where you can add a new question.
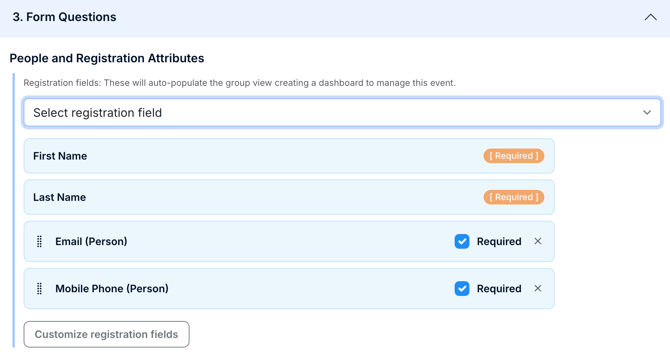
 On the Customize Group Registration Fields page, click the New Registration Field button.
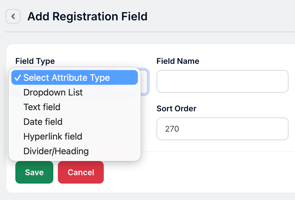 There are several field types; the most common are drop-down and text fields.
The field name is the question you are asking on the form, such as T-shirt size or Grade.
The Divider/Heading option will just place a Heading Text - great for separating sections within the form or adding further detail/instruction.
Once you've created all your custom fields, click "Back to Registration Settings." Select the newly created field(s) from the drop-down menu to add to your form.
FORM / EVENT SETTINGS
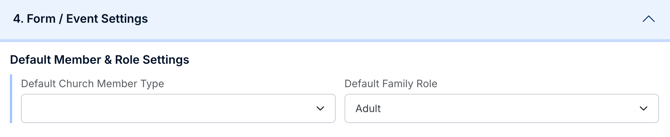
Default Member & Role Settings: The roles you select here will become the default for anyone newly registering into your system using this form. If a registrant is already in your system, this will NOT override their current Church Member or Family Role.
Date & App Settings: Set the Event Start Date for the actual day of the event (this must be a current or future date).
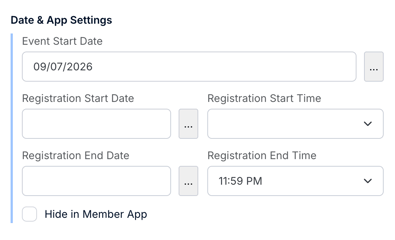 Set the Registration Start Date for the date you want the event to open for registration. The event will begin showing in the app on this date. An event must have BOTH the Event & Registration Start Dates to be visible in the Churchteams App.
Set the Registration End Date for the date you want registration to close. When this date is reached or the "Maximum Size / Registration Limit" is reached, the event will be marked in the app, or anywhere you are using website integration, with a red button as "Registration Closed / Details."
Learn more about how to set events up in the Churchteams App,
Attendance Settings:
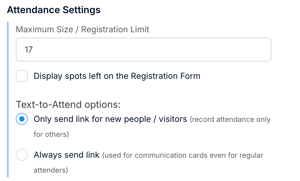 Use this section to set a registration limit and text-to-attend options.
Learn more about Text-to-Attend.
Registration Completion Options:
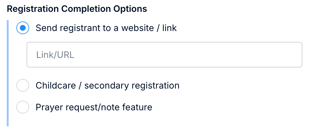 Use this section to direct people to other steps or more information after they complete registration.
If you choose Childcare/Secondary registration or the Prayer Request/Note feature, you will need to set up the groups to handle them first.
PAYMENT & FUNDRAISING OPTIONS
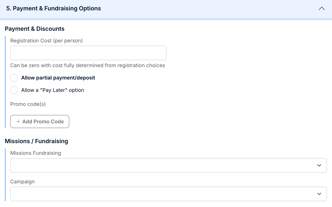 For basic cost situations, enter the amount in the "Registration Cost (per person)" at the top of Section 5. Example: $150 fee for camp for each registrant, and no additional costs.
For more complex payments (Camp cost is $150 for 1 child, $275 for 2 children, etc.) create a "Custom registration field" in Section 3 of the Settings. If you use the custom fields, you likely won't need the registration cost field here.
Click HERE for video tutorials on settings, payment scenarios, and Missions fundraising options in Churchteams registrations.
FOLLOW-UP COMMUNICATIONS
Registrant Confirmation Text: The Confirmation Text is sent only when someone registers using a texted Keyword (entered in Section 1 of the Registration Settings). We recommend you write a custom confirmation text for your registration.
Registrant Confirmation Email: Enter a custom confirmation message here to override the default email message. This is a great way to communicate packing lists for camp, parking instructions for event attendees, and other such details you will want people to access later.
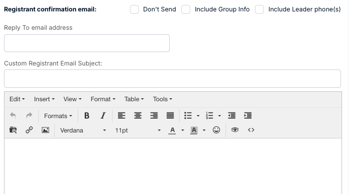 Click the option for "Don't Send" if you don't need a confirmation email - this is great for people completing general forms.
We recommend leaving "Include Group Info" UNchecked unless the registration is a class or small group sign-up. Checking this option sends an email with leader and next meeting information to the registrant.
Event Full Notification: Use the Event Full content section to add information about waiting lists or when the next registration will open.
LeaderNotification: Group Leaders will get a default notification emailed to them anytime someone registers for an event. The default message is found at Groups & Events > Settings > Browse Groups Page. You can override this default by entering a custom message in the Leader Notification box. Ex: "James Smith signed up for Youth Camp. Send him a text to let him know you're looking forward to seeing him and will send the prayer devotional soon."
Automatic Email List Opt-In:
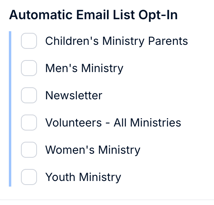 Check the box for any Email List you want registrants to be added to automatically. They will be added to the selected email list and can opt out any time. This is a great way to add people who sign up for a Youth Event to the Youth Ministry newsletter.
TRACKING PAYMENTS COLLECTED THROUGH A REGISTRATION
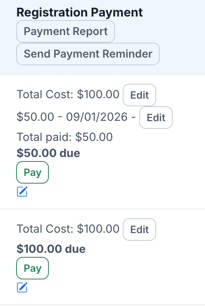 The snippet shown is from the Registration Payment column on a group page where a cost was associated with a registration (but not required).
You can track payment info directly in the Group View. You can also handle Payment Report and Send Payment Reminders directly from the group page.
Other reports (Reports > New > Financial) that will show payment information are: Registration Payment Summary, Registration Payment Detail, and Online Reconciliation Report. These can be filtered to a specific group, set up as a Saved report, and then scheduled to be delivered automatically to a leader and/or treasurer on a regular basis to better monitor payments.