
Export Transactions
1. Login to Pushpay and go to Transactions.
2. Enter the desired date range in "Transaction period".
3. Below the "Selected filters" at the bottom of the screen, remove the "Processing" and the "Failed" filters and leave only "Success" so you only export successfully processed transactions.
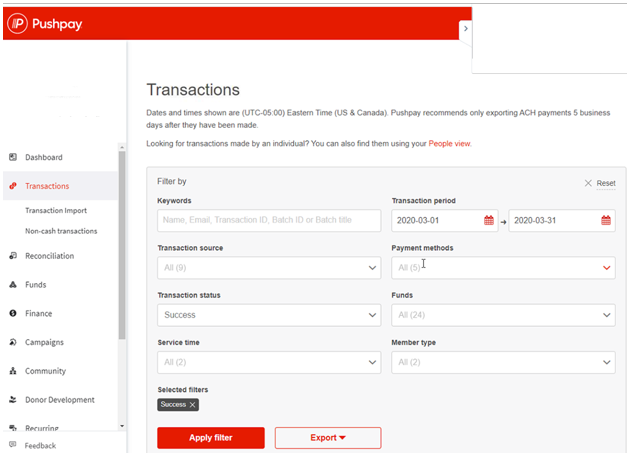
4. Click "Apply Filter" and review the count to make sure it is accurate.
5. Click the "Export" drop down button and select "to CSV (Legacy)". NOTE: Do not select the "Export for Churchteams" option. Despite the name, it is an old format that is no longer accurate. The file that is created should have a "Payor ID" column that will be mapped to Churchteams "External Account ID".
6. Once you have your first export file, please contact the Data Conversion Team at Churchteams for assistance in setting up and running the first import (data@churchteams.com). Once we run the first import, we will send you instructions on how to run the import process on your own.